Halloween is just around the corner, so I'm keeping an eye out for fun, fab
Halloween craft and decor ideas. This year The Pea is all about patterned duct tape -- she has been using it to create everything from wallets to hair ribbons. So when Scotch duct tape sent me some Halloween-themed rolls, I decided to try my hand at creating a craft of my own. I came up with cute Halloween gift bags. Here's how to make them:
You'll need duct tape (2 inches wide) in 3 different colors. I used solid black, solid orange, and a monster-pattern. You'll also need an exacto knife or cutter, a metal ruler, and a cutting board (I used an old chopping board!).
Here's my oh-so-high-tech pattern for the bag. You're going to make 5 duct tape panels -- 1 bottom, 2 sides, a front and a back -- by laying strips of duct tape down in slightly overlapping panels, then covering the sticky side with a second layer of duct tape. When you measure out your strips, make them a bit longer than indicated (i.e. for the bottom panel, cut your duct tape strips to about 6.25" instead of 6" long), so you can trim them neatly.
I used black duct tape for 1 side of the panel, and the monster patterned duct tape for the other side.
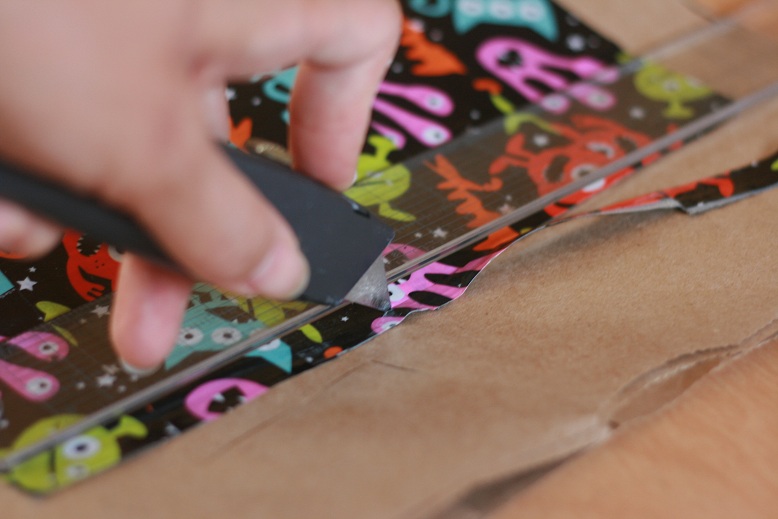
Trim the edges with your knife and ruler so they correspond to the measurements I indicated above.
Here are all my panels, black on 1 side and monsters on the other.
Lay the panels, pattern-side down, as shown in the photo. Position the bottom panel in the center, then lay the 2 side panels above and below it. Lay the front/back panels to the left and right of the bottom panel.
Tape the bottom panel to the side, front and back panels with duct tape in a contrasting color (I used orange tape, which shows up nicely against the black). Then fold the side, front and back panels up, so that the black side is on the inside of the bag.
Tape the side panels to the front and back panels, using the contrasting colored tape. Start with the insides, then do the outsides.
It can be tricky to get the sides aligned and taped up neatly! I used my ruler to firmly push the tape onto the panels so that all the corners are nice and squared.
I cut the orange tape a big longer than the height of the bag, so that I could fold the tape over and make a neat edge. Don't forget to tape the top rim of the bag with the contrasting (in my case, orange) duct tape!
For the handles, cut a length of duct tape in the contrasting color, then cut a small slit (1 or 2 inches) at each end of the tape.
Fold the strip of tape in half lengthwise, make sure the 1 or 2-inch portion at each end does NOT stick to each other.
Attach the handle to the inside and outside of the bag.
And there you have it, a cute bag for Halloween! It's perfect for stuffing little Halloween goodies into, so you can use it as a party goody bag or a
Boo Bag. You can adjust the length of the strips and the number of strips per panel to make the bag to any size you want, so it can even become a Halloween trick-or-treat bag for your child, or your child's doll. Happy crafting!
Disclosure: I received duct tape samples from Scotch. Click here for my Scotch Colors & Patterns duct tape review post.


1 comment:
Ηi there, I гead your blog on a regular basis. Your writing style is
awesome, kеep doing what you'rе doing!
my homepage ... homеpage ()
Post a Comment